Create a case template
Click on New in the "Case templates" window to create a new case template.

The "New case template" dialogue opens. Here you can add and fill in the fields that you want to include on the case template.
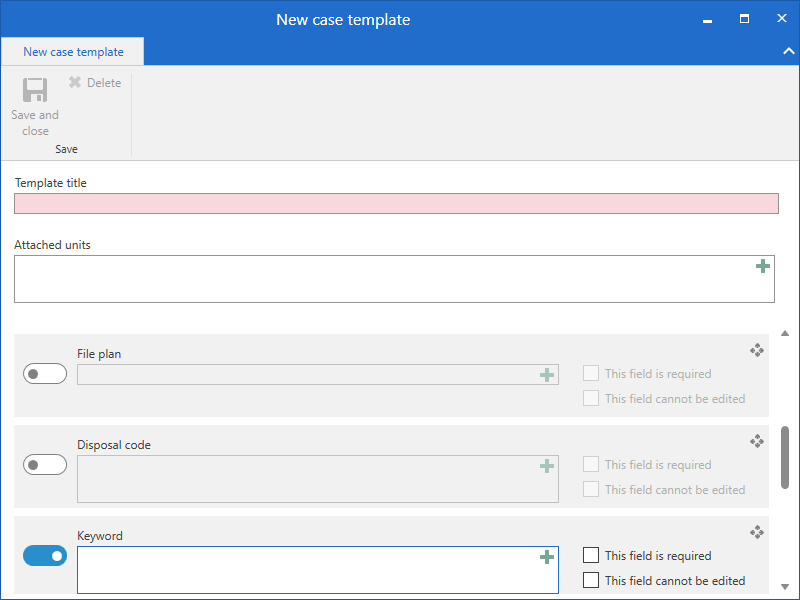
To the left of each field is a slider. Click the slider to include the field on the case template. If the slider is blue, the field is included.
To the right of each field are a number of options for defining the field. For each field you include you have certain options, such as making the field mandatory or making the field editable by the user creating the case.
These elements are described in the table below.
| Element | Description |
|---|---|
|
Create a new installation reference. A field included on the case template may be empty - and may then be filled in by the user during case creation - or it may contain one or more installation references. An installation reference may be considered a type of shortcut that helps establish the framework of a case. For further information, see Add an installation reference from the "New case template" dialogue. |
|
Left-click on this symbol and drag the corresponding field to the wanted location on the case template. |
|
Check this box to make the field mandatory for a user to fill in when using the template to create a new case. |
|
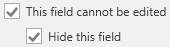
Check this box to add the field to the case template, but make it uneditable to users who create a case using the template. When this box is checked, the template creator must fill in the field during creation of the case template. Checking this box may be useful for creating a template for cases that must always have the same access restriction. |
|
A field that cannot be edited can also be hidden for the users who will be using the case template. Check this box to hide the field so it cannot be seen on the template. |


Case template fields
The table below describes the fields which can be included on a case template.
| Field | Description | ||||
|---|---|---|---|---|---|
Template title |
Enter a title for the template. The field is mandatory. The title is shown when the case template is created and made available to other users in the drop-down menu in the "New case" dialogue. |
||||
Attached units |
Specify the unit that will be using the case template. If you add a unit here, the case template will only be visible to this unit’s users as well as users in its subunits. Users with a a job role in the attached unit will see the case template title in bold followed by their unit’s name in brackets in the "New case" dialogue. If this field is empty, all of the organisation’s users will have access to the case template by default.
|
||||
Title |
Lets you specify a case title.
|
||||
Access restriction |
Lets the template or case creator specify an access restriction on the case or on the case template itself. If you include the field on the case template without filling it in, users can set an access restriction for the case in the "New case" dialogue when selecting this case template. If you include the field on the case template and fill it in with an installation reference pointing to e.g. a unit, only users in the specified unit can access the case template. The field in the "New case" dialogue will then be filled in with the content of the installation reference.
When creating a case using a case template, an access restriction on the template will overwrite any other access restriction or security group which the case creator may have set up in their personal settings or in connection with a file plan. |
||||
Action code |
Lets the template or case creator add an action code to the case. Action codes are used when labelling a case, e.g. as further categorisation of a file plan or as tags. Action codes are managed in a value list by a user with the "Value list administrator" privilege. Read more about managing value lists.
|
||||
Disposal code |
Lets the template or case creator add a disposal code to the case. Disposal codes are managed in a value list by a user with the “Value list administrator” privilege. Read more about managing value lists.
|
||||
Case participants |
Lets the template or case creator add case participants.
|
||||
Deadline |
Lets the template or case creator add a deadline to the case. |
||||
Disposal code |
Lets the template or case creator add a disposal code to the case. |
||||
File plan |
Lets the template or case creator add a file plan to the case.
|
||||
Keyword |
Lets the template or case creator add keywords to the case. |
||||
Progress code |
Lets the template or case creator add a progress code to the case. |
||||
Responsible |
Lets the template or case creator add e.g. a user or unit that is responsible for the case. |
||||
Supplementary case managers |
Lets the template or case creator add a supplementary case manager. |
||||
Case guide |
Lets the template or case creator add a case guide.
|
Click Save and close in the ribbon when the template is done. The template is then available in the drop-down menu in the "New case" dialogue.
Add an installation reference from the "New case template" dialogue
Case template fields can be pre-filled using installation references. When you start typing in a field, F2 automatically suggests relevant installation references.
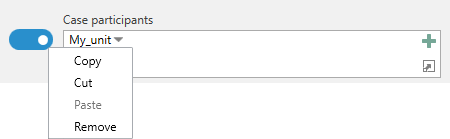
When an installation reference is added to a field, click the down arrow next to it to open a context menu. From here it is possible to copy, cut, paste, or remove the installation reference.
If an installation reference is not in the system, the error message below is shown. The error message also appears if there is a typo in the entered installation reference, which is underlined in yellow.

If an installation reference is not in the system, it may be created by clicking the ![]() icon in the top right corner of the relevant field.
icon in the top right corner of the relevant field.
This opens the “New installation reference” dialogue, which is identical to the dialogue that can be accessed from the Installation references menu item on the “Administrator” tab.