Customise toolbars, ribbons, and context menus
You can adjust the number of menu items and buttons displayed in F2’s user interface. This page describes how you add or hide menu items and buttons in the following three locations:
-
The "Quick Access" toolbar in the main, record, and case windows
-
The ribbon in the main, record, and case windows
-
The context menus for the result list viewed as records, cases, documents, and requests.
| An administrator in your organisation can create default settings to customise the ribbon, the "Quick access" toolbar, and context menus for specific users and groups. Ribbons, context menus, and the "Quick access" toolbar may already be customised for you. |
Customisation via the ribbon’s context menu
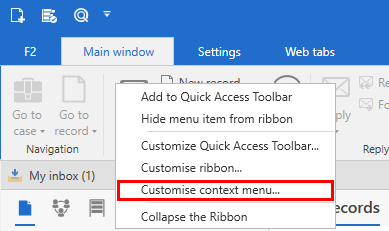
You can customise the toolbar, ribbon, and result list context menus in the "Customise the toolbar, ribbon, and context menus" window, also called the customisation window. You can open the customisation window from the ribbon’s context menu in the main, record, or case windows. The image below shows the ribbon’s context menu opened from a menu item on the main window’s ribbon. You can also open the context menu by right-clicking on a menu group.
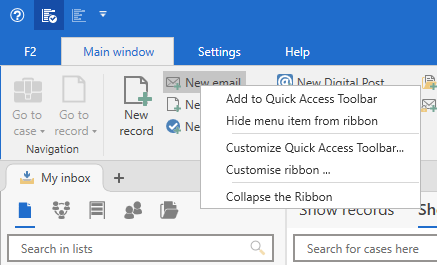
The table below describes the functions in the ribbon’s context menu.
| Function | Description |
|---|---|
Add to Quick Access Toolbar |
Add the menu item or group you have right-clicked on to the "Quick access" toolbar. |
Hide menu item from ribbon/Hide group from ribbon |
Hide the menu item or group you have right-clicked on from the ribbon. |
Customise Quick Access Toolbar… |
Go to the "Quick access" tab in the customisation window. |
Customise ribbon… |
Go to the "Ribbon" tab in the customisation window. |
Customise context menu… |
Go to the "Context menu" tab in the customisation window. |
Collapse the Ribbon |
Collapse the ribbon if you need more screen space for, for example, the result list, preview, or an advanced search. |
Customise the "Quick access" toolbar
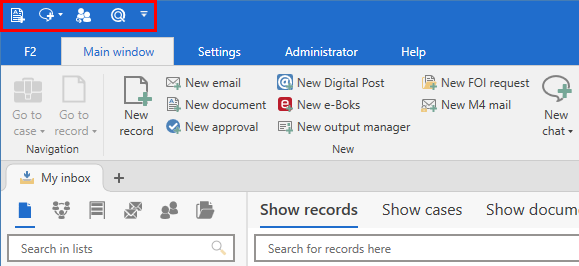
The "Quick access" toolbar is found in the upper left corner of the main, record, and case windows. You can add menu items from the ribbon to the quick access toolbar. This provides you with quick access to features you frequently use in your work within the window in question.
Customise the "Quick access" toolbar via the context menu
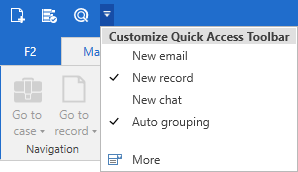
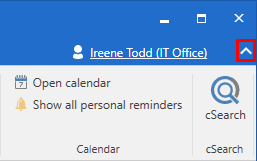
The "Quick access" toolbar is marked with a drop-down arrow icon ![]() . Click the icon to open a list of suggested functions you can add to the toolbar. The suggestions vary depending on whether you open the drop-down menu from the main, record or case window.
. Click the icon to open a list of suggested functions you can add to the toolbar. The suggestions vary depending on whether you open the drop-down menu from the main, record or case window.
Customise the "Quick access" toolbar via the customisation window
Click on the toolbar’s drop-down arrow icon ![]() and then on More to open the customisation window. You can also open the customisation window via the ribbon’s context menu.
and then on More to open the customisation window. You can also open the customisation window via the ribbon’s context menu.
On the "Quick access" tab in the customisation window, you can add and remove individual menu items or groups of menu items.
At the top of the customisation window, select the tab in the main, record, or case window from which you want to choose menu items (1). You can search for menu items in the "Available menu items" search field (2). Deselected menu items are displayed on the left side of the window (3), while selected menu items are displayed on the right (4).
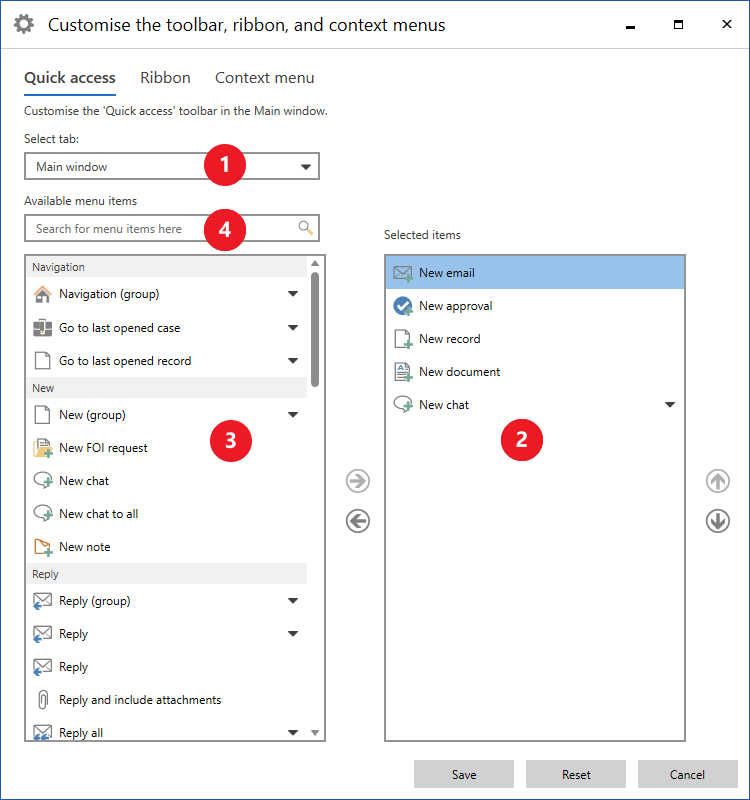
Select the menu items you want to add or remove. Click on the arrows in the middle of the window to move the menu items. You can also move a single menu item by double-clicking it. The changes take effect immediately, so you can see them while editing.
Click on Save to finish your customisation. Click Cancel to discard your changes and close the window. You can also reset your customisation.
Customise the ribbon
You can customise the ribbon in both the main, record, and case windows by hiding menu items that you do not use. You can do this from two places:
-
The ribbon context menu
-
The customisation window.
Customise the ribbon via the context menu
Right-click on a menu item or group in the ribbon to open the context menu.
Select Hide menu item from ribbon to remove the menu item from the ribbon. You can also right-click on a menu group’s name and select Hide group from ribbon to remove the entire group from the ribbon. You can always add a menu item or group back to the ribbon via the customisation window.
| You can still use keyboard shortcuts, even if the menu items are hidden. |
Customise the ribbon via the customisation window
In the customisation window on the "Ribbon" tab, you can select which menu items to display on the ribbon in the main, record, and case windows. The three windows have different menu items. Therefore, you should open the customisation window from the window where you want to customise the ribbon.
At the top of the customisation window, select the tab you wish to customise (1). You can search for menu items in the "Available menu items" search field (2). Deselected menu items are displayed on the left side of the window (3), while selected menu items are displayed on the right (4).
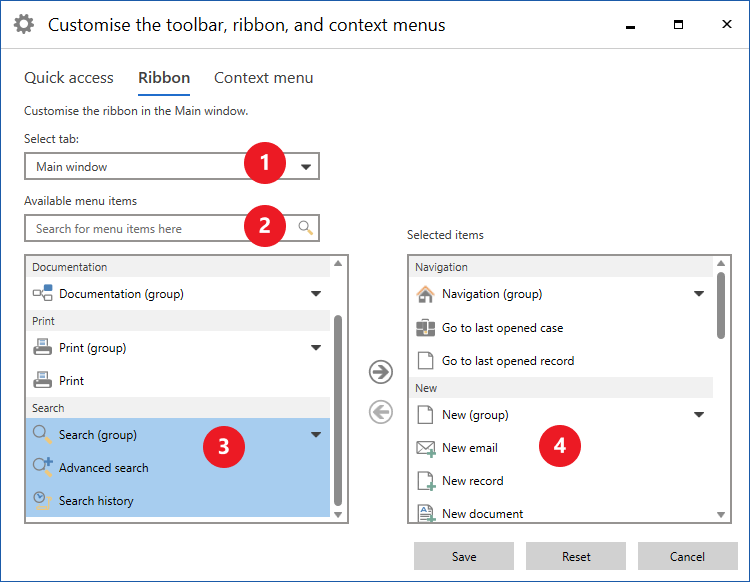
Click on the menu items you want to select or deselect. Click on the arrows in the middle of the window to move the menu items. You can also move a single menu item by double-clicking on it. The changes take effect immediately, which means you can see them while editing.
Click on Save to finish your customisation. Click Cancel to discard your changes and close the window. You can also reset your customisation.
Customise context menus
In the customisation window on the "Context menu" tab, you can customise context menus for records, cases, documents, and requests in the result list. For example, you can hide menu items that you do not use. Click "Customise context menu…" in the main or case window ribbon’s context menu to open the customisation window.
At the top of the customisation window, select the list whose context menu you want to customise (1). You can search for menu items in the "Available menu items" search field (2). Deselected menu items are displayed on the left side of the window (3), while selected menu items are displayed on the right (4).
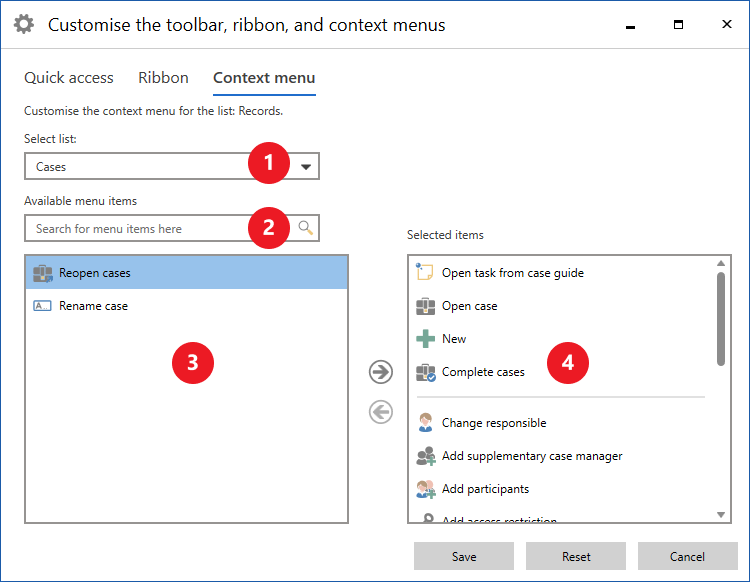
Right-click in the "Selected menu items" panel to add new horizontal separators. You can change their position in the context menu by using drag and drop. Remove a separator by right-clicking on it and selecting Remove separator.
Click on Save to finish your customisation. Click Cancel to discard your changes and close the window. You can also reset your customisation.
Reset customisation
You can reset your customisation of the toolbar, ribbon, and context menus. Click on Reset in the "Customise the toolbar, ribbon, and context menus" window to open the "Reset customisation" dialogue. Here you can choose which tabs or views you want to reset. You can also choose to reset all customisations in the window in question.
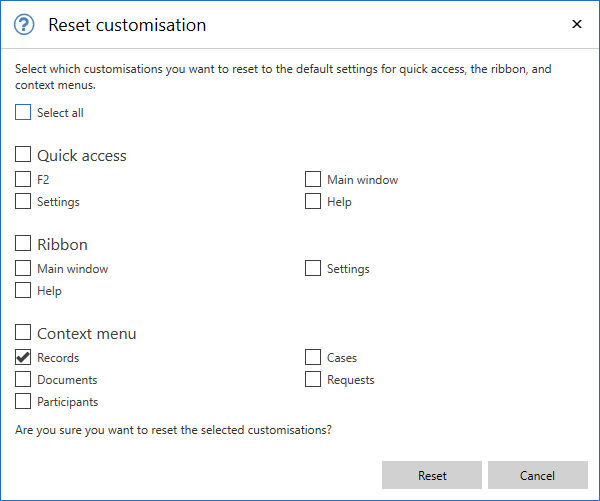
| The customisation window opens for the window you are in, either the main, record, or case window. Likewise, resetting your customisation applies to the window from where you opened the "Reset customisation" dialogue. |
Collapse the ribbon
You can collapse the ribbon in the main, record, and case windows in several ways.
You can right-click on the ribbon and select Collapse the ribbon in the context menu. You can also collapse the ribbon with the keyboard shortcut Ctrl + F1, by double-clicking on a tab title (for example, "Main window"), or by clicking on the up arrow icon next to the user identification.
You can display the ribbon again with the keyboard shortcut Ctrl + F1 or by clicking on the down arrow icon next to the user identification.