Settings in F2 Touch
To go to settings, swipe right on a list or tap the menu icon above the lists and folders view.
Tap Settings in the upper right corner.
The list of personal settings opens.
The table below describes the personal settings in F2 Touch.
| Function | Description | ||
|---|---|---|---|
Settings |
|||
Show X records in your inbox. |
Specify the number of records shown in your inbox. Adjust the number of records by dragging the slider. 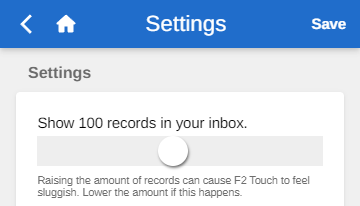
Figure 4. Adjust the number of records in your inbox
Tap Save to apply your changes.
|
||
Download documents in the inbox automatically |
Choose when to download documents to your inbox. Options:
Tap Save to apply your changes. |
||
Show automatically hidden status messages |
Choose for how long F2 Touch shows automatic status messages from which you can undo an action. For example, an automatic status message is shown when you send an email or when you change your personal settings and leave the "Settings" screen without saving. Options:
Tap Save to save your changes.
|
||
Show role selector at login |
Choose whether to show the role selector before you log in. Your choice affects both F2 Touch and F2 Desktop. To activate, tick the box next to Show role selection at login. Tap Save to apply your changes. |
||
Work outside office hours |
|||
Expedite mode |
You can enable expedite mode for F2 Working Hours. You can enable expedite mode from your settings if you have dismissed the yellow bar that informs you that you are using F2 outside of working hours. Tap Save to apply your changes.
|
||
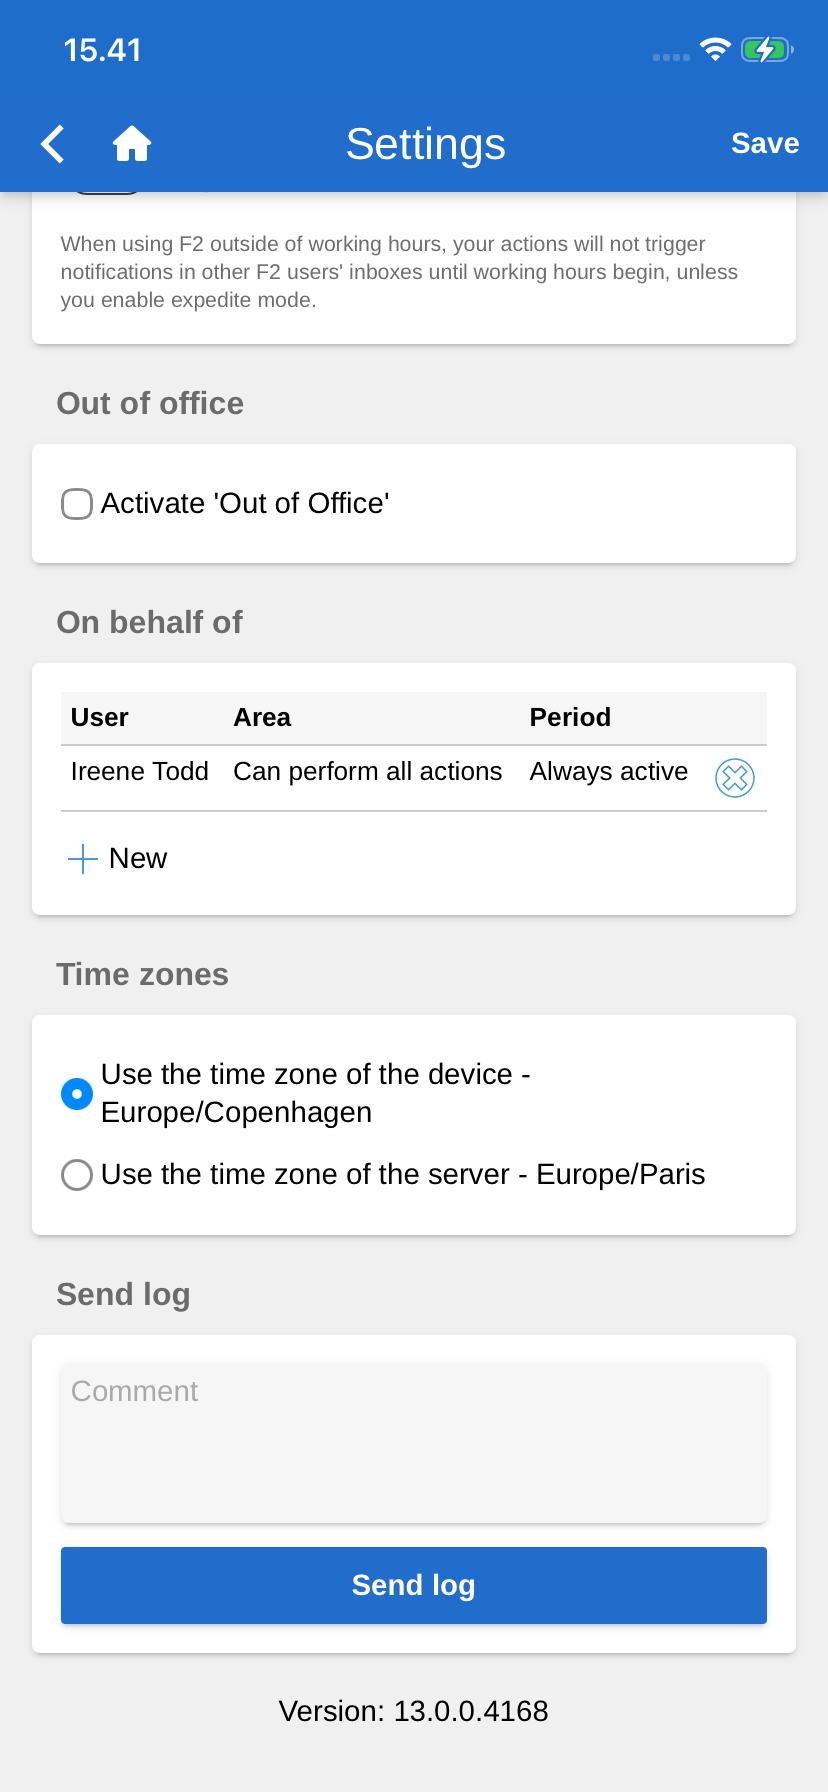
Out of office |
|||
Activate 'Out of office' |
In F2 Touch you can create an "Out of office" message. The procedure is the same as in F2 Desktop. Tick the Activate 'Out of office' box and specify:
Tap Save to apply your changes. |
||
On behalf of |
|||
Create "on behalf of" rights |
In F2 Touch you can assign "on behalf of" rights to another user. Tap New under the "On behalf of" header. 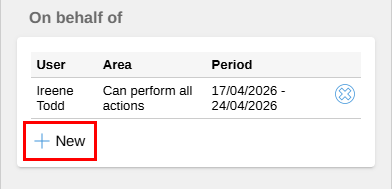
Figure 5. New "On behalf of"
You can then specify:
Tap Create to complete. Tap Save to apply your changes. |
||
Remove "on behalf of" rights |
You can remove a user’s "on behalf of" rights by tapping the X icon Tap Save to apply your changes. |
||
Show "On behalf of" rights assigned by an administrator |
Tick the box next to Show 'On behalf of' rights assigned by an administrator to display all users with "on behalf of" rights created by a user with the "on behalf of administrator" privilege. Users with "on behalf of" rights set up by an administrator are hidden by default and their names appear in italics. 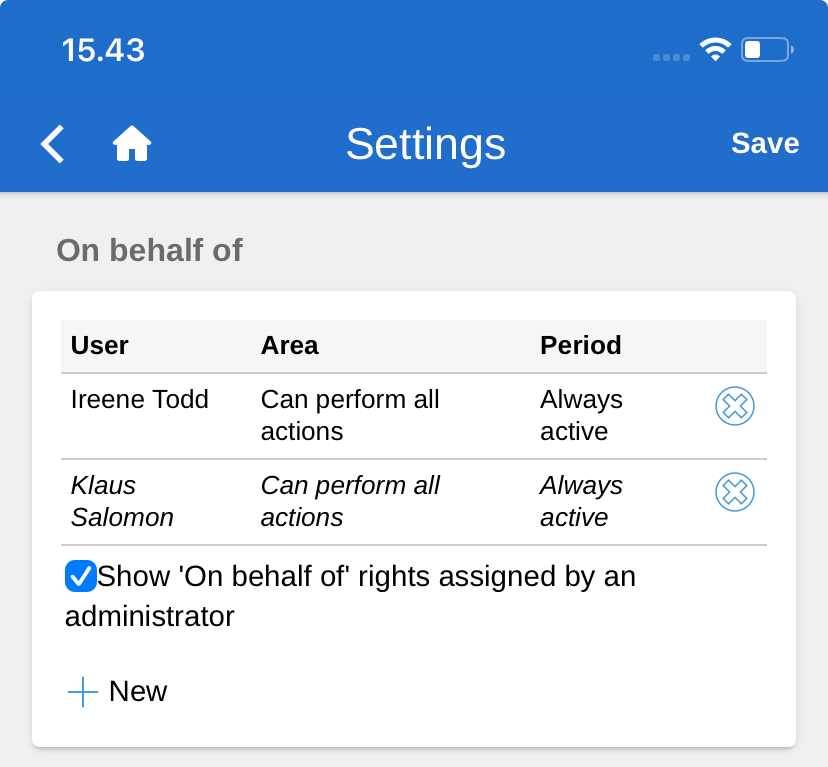
Figure 6. Show "On behalf of" rights assigned by an administrator
|
||
Time zones |
|||
Select time zone |
F2 Touch’s time and date are based on your device’s time zone by default.
The selected time zone is used for deadlines and similar fields. If you are using the device’s time zone, deadlines will be shown in your local time zone, also when you are abroad. This also applies when you set a time and date in connection with e.g. deadlines or searches. If the time and date is generated on the server, it will always reflect the server’s time zone. Tap Save to apply your changes. |
||
Send log |
|||
Send log |
You can manually send your log from the bottom of the "Settings" screen. Tap the Send log button to send a log to cBrain. This function can be used to report any errors experienced in F2 Touch. You can add a comment in the text field before sending the log file if you have additional information. |
||