Merging with templates
| The content of this website is last updated to F2 version 13. cBrain are working hard on supplying you with the newest documentation of F2. In the meantime you can read about the latest features and changes in our release notes. |
F2 Merge Codes makes it possible to automatically merge data from F2 with templates for Microsoft Excel and Word. Create templates directly from the main window on the “Settings” tab by clicking on the Document templates menu item.
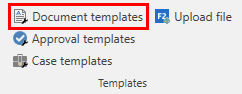
The “Document templates” window offers an overview of existing templates available in F2 and the option of creating new templates.
Create a new template by writing its content in an editor outside F2 and then importing the document via the "Document templates" window. F2 Merge Codes supports the following types of files: DOTX, DOTM, DOCX, and DOCM.
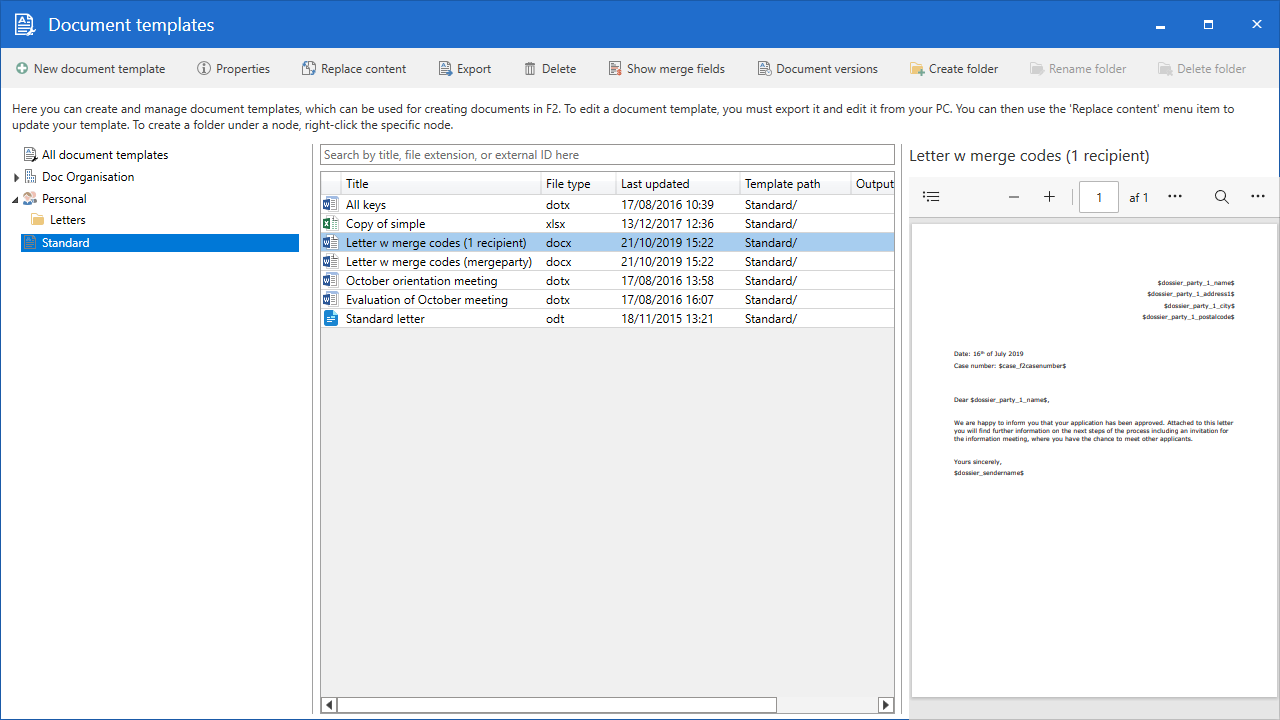
Click New document template in the window ribbon to add a new template. Any user can add templates to their personal and their unit’s folders, while users with the “Template administrator” privilege can add templates that the entire organisation can access and use.
Show merge fields
You can get an overview of merge fields from the "Document templates" window.
Click on Show merge fields to open a search window. Select the record whose merge fields you would like to view, and double-click on it or click on OK. The window "Merge fields on [record title]" then opens, displaying all available merge fields for a record, its case, and its attached documents.
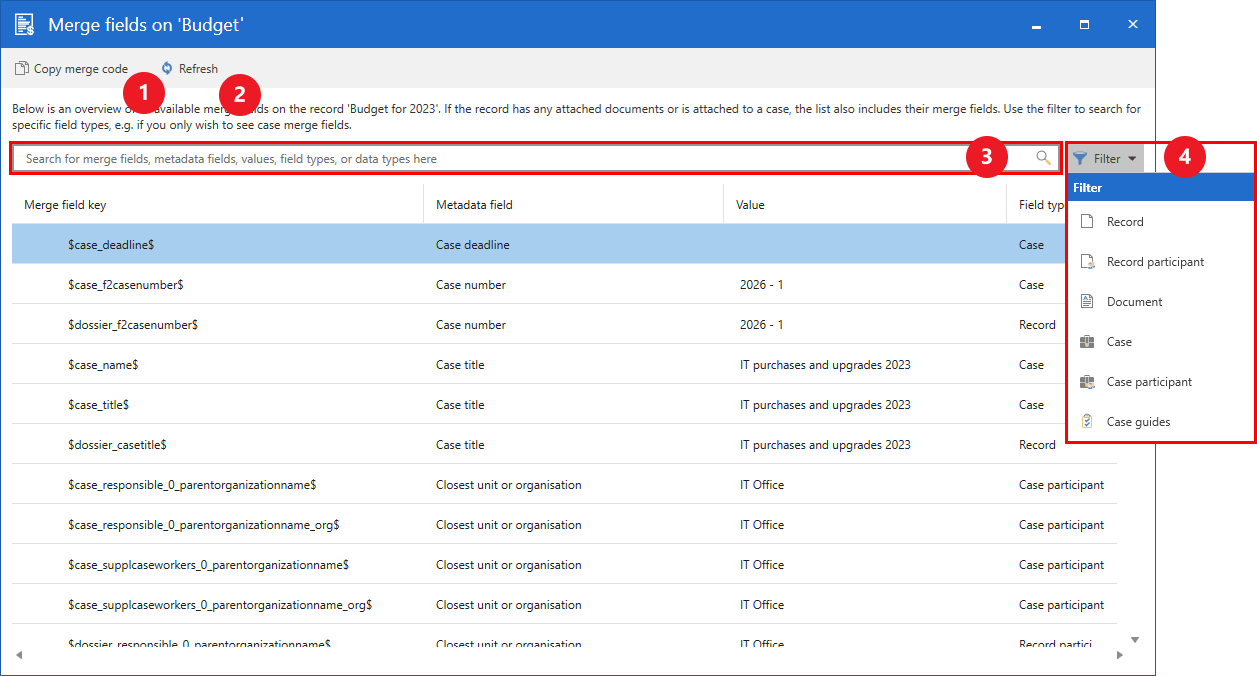
You have the following options in the window:
-
Copy the merge code you have selected in the overview.
-
Refresh the overview with the latest changes to the record and its associated case.
-
Search for a merge field.
-
Filter merge fields to only see one type in the list, for example the case merge fields.
New document from template
Templates with merge codes work much the same way as regular templates. Attach the template to a record by clicking on New document from template in the record window ribbon. When the document template is attached, F2 immediately replaces all merge codes with the corresponding information retrieved from the specific record and its participants.
| Data from records and cases are merged immediately when a document from a template is attached. It is therefore important to ensure that all relevant information is already saved on the record and the case before attaching the template. Later changes to the metadata will not be merged with the generated document. |
F2 will display a warning dialogue if a template containing merge fields is attached to a record with unsaved metadata (e.g. “Record participants”). This dialogue prompts the user to save any changes to the record before attaching the template.
The reason for the warning is that the database has not been updated with the latest information from the record. The database is only updated whenever a record or a case is saved. F2 displays a similar warning when a user attempts to attach a template to a record while editing it, as any unsaved changes will not be merged with the template.
Disable template merging
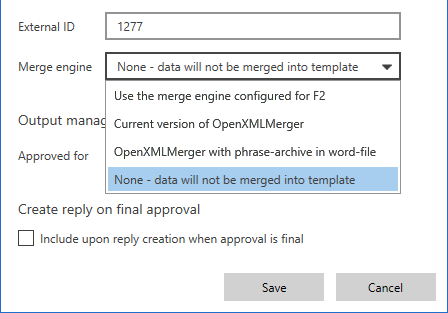
The merging of data with document templates can be disabled for specific templates in F2. This is useful if the merging fails, but it is necessary to create the document regardless. Click on Document templates in the ribbon of the “Settings” tab to open the "Document templates" window. Select the relevant template and click on Properties in the window ribbon to open the “Document properties” dialogue. From here, the merge engine can be changed to “None” as shown in the example below.
Example of merging data for a letter
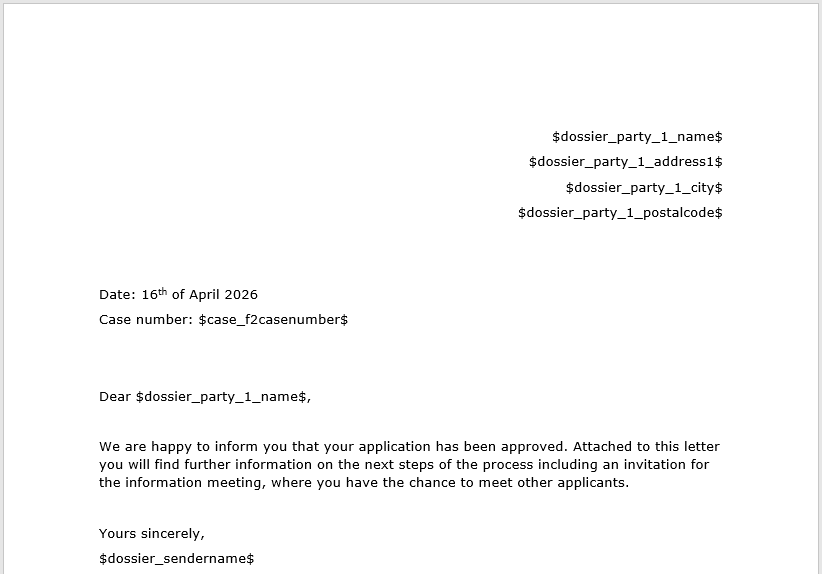
The following example demonstrates how merge codes can be used in a standard letter with a single recipient. The template for the letter contains a number of merge codes listed in the table below.
The “Merge field” column contains the names of the fields in the database (metadata), and the “Description” column describes the content of the corresponding metadata field.
| Merge field | Description |
|---|---|
dossier_party_1_name |
Recipient’s name |
dossier_party_1_address1 |
First line of recipient’s address |
dossier_party_1_postalcode |
Recipient’s postcode |
dossier_party_1_city |
Recipient’s city |
dossier_sendername |
Case manager’s name |
case_f2casenumber |
Case number |
The corresponding merge codes are created by adding “$” before and after the merge fields' names. Below is an example of a letter template with a single recipient (record participant):
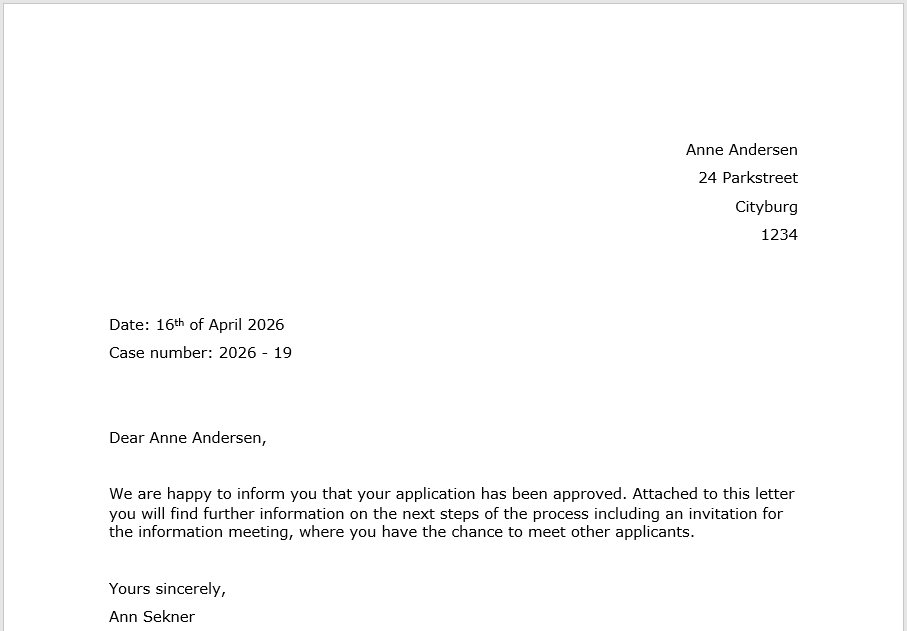
A letter template added to a record with the four following metadata fields will produce a letter like in the figure below:
-
Case manager = Ann Sekner
-
Case number = 2020 - 19
-
Participant = Anne Andersen
-
Participant’s address = 24 Parkstreet, 1234 Cityburg
Show paragraph marks in Word for list merge codes
When you merge a document containing list merge codes, the merge engine repeats each merge code and inserts data as many times as there are items in the list.
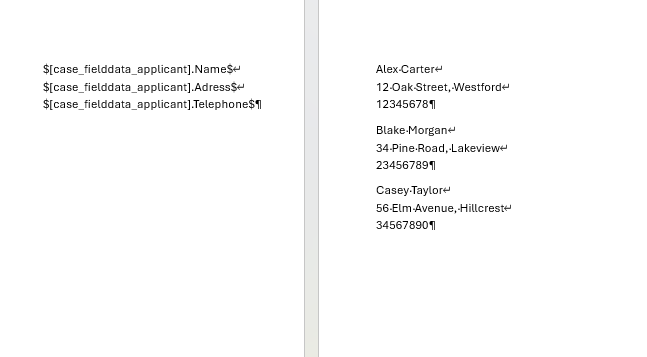
If you are setting up a template in which data from list merge codes must be displayed one item at a time, for example participant name, address, and telephone number, make sure that the list merge codes are placed within the same paragraph in Word.
If list merge codes containing multiple items are placed below each other in separate paragraphs, all items belonging to the first list merge code are inserted first, followed by all items belonging to the next list merge code.
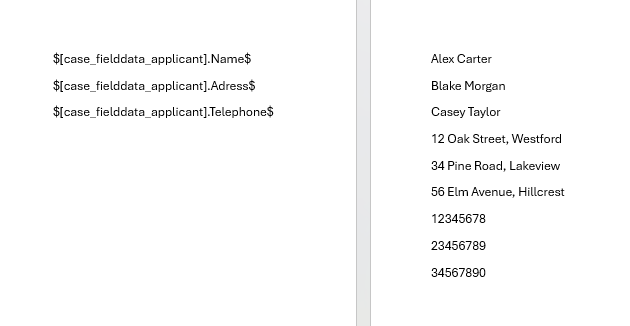
To ensure that the template has the intended layout, you can show paragraph marks in Word. This lets you see how many merge codes each paragraph contains.
On the Home tab in Word, click Show/Hide ¶ in the "Paragraph" group.

The paragraph marks indicate where each paragraph ends. You can then set up the template with list merge codes to produce the intended layout.
| To insert a line break within a paragraph, press Shift+Enter. |